SHARING / REPOSTING GUIDELINES: We're very happy to have posts/articles shared as direct links.
However, if you are replicating and re-posting information from this website or our posts, Abbey requests that you:
A) Only ever share articles in part (not in full). (eg. You can lift a paragraph as a way of introducing your readers to the topic) B) Be sure to always provide a direct link/URL back to the full original article here on the MyHealingCommunity.com website. Thanks in advance for your co-operation when sharing and re-posting any and all information that appears on this website.
Make your own Liposomal Vitamin C at home
Ingredients
- 100g Ascorbic Acid (I use this one)
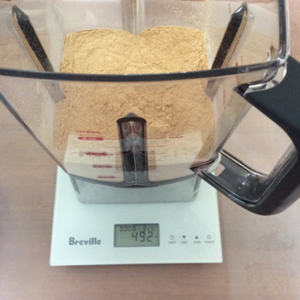
- 1480 ml Pure water 492g non-GMO
- Sunflower Lecithin Powder
Equipment
- 1 x good blender with 2L jug
- 1 x Kenwood mixer or similar
needs to have a large 2 Litre bowl. - 1 x 3 litre or larger Borosilicate glass beaker
(this glass is used in coffee plungers and lab equip.) - 2 x 2 litre glass jars with lids
- 2 x spatulas
- 1 x sieve
- 1 x kitchen scales (digital might be best)
This is the balloon style stirring piece that I always use to make my Lip C using my 1970’s Kenwood mixer.
Day 1 - DIY Vitamin C
Process: With this recipe we need to divide up all ingredients by 2.
Yes, we start by halving up each total. This is so we can do the blending more easily and accurately.
My blender says it can take 2 litre but there is bubbly foam. This foam needs space in the blender or things get really messy too fast.
So measure out the total into 2 halves.
400g Ascorbic Acid into 2 x 200g
1480ml Pure water into 2 x 740 ml
492g Sunflower Lecithin Powder into 2 x 246g

Worried about what this longer than normal use might do to your mixer?
One way I have helped my mixer stay on so long without fear of overheating is by placing a cooling rack ..like one you would place cookies on, under the mixer itself. This allows air to circulate within the cast metal structure of the mixer and heat to escape more easily.I find the mixer is noisy.
You might find a clean cool place on the patio to plug in the mixer and cover with a clean cloth and clip cloth to secure so it doesn’t blow into your bowl and get mixed in!!
Set a timer on your phone and check on it with your temperature gun (during the mixing).
Why is this Vitamin C recipe for a large quantity?
The reason I have written a 2 Litre recipe not a smaller more easy to consume in 6 weeks (e.g a 1 Litre recipe would do most just fine), is so that during this hour the precious liquid always covers the mixer balloon.
If the liquid level falls under the top of the mixer blades it will pull in too much air in the mix.
1 person consuming 2 litres over 6 weeks would mean taking about 45ml of the total liquid each day. In my mind this is not too much if you are healing something major.
Day 1 Vitamin C Recipe - Steps
- Combine the first 200 g Ascorbic Acid with 740ml Pure water in a Borosilicate glass beaker.
- Place this beaker with Ascorbic Acid and water inside a stock pot containing 50 degree Celsius tap water.
Stir the Ascorbic Acid and Water constantly keeping a close eye on the temperature. - Once it hits 25 degree Celsius take the beaker out of the water and continue stirring until there are no or very near to none granules of Ascorbic Acid visible and the liquid is clear. If it’s a cool day you may have to place it back in the hot water.
- Sieve 246 g Sunflower Lecithin into a bowl and place in the blender jug.The lecithin has to be put through a sieve to ensure you are not going to eat and moisture absorbing pillows and to smooth out the harder lumpy bits.
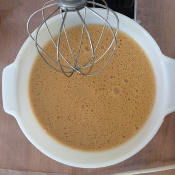
- Pour the clear 25 degree Celsius ascorbic acid water mix over the SFL in the blender jug
- Place the lid on and give it a little bit of low-speed blending for about 15-30 seconds.
- Turn off blender after 15-30 seconds and scrape the powder that is stuck on the side of the blender jug into the wet mix using a spatula.
- Turn it back on the lowest speed setting and leave it blending until it comes up to 30-33 degrees C.
- So once the blender gets to around 30-33 degrees. I stop it and I let the blender engine cool down for 5 minutes to preserve the life of the motor in the blender. This is a good time to start measuring an sieving and dissolving your second half of the ingredients.
- After I have let the blender motor cool down for 5 minutes I then restart it, this time I bring the temperature of the mix up to 42 degrees Celsius.
- Pour this 42 degrees C liquid into the Kenwood chef glass mixing bowl and leave it there while repeating all the above steps with the second half of the ingredients.
- Once both halves of the ingredients are blended and are together in the Kenwood mixer. Turn the mixer on to lowest setting that doesn’t sound like it straining the motor at all.
- Depending on the room temperature where you are you, it will take as long as it takes to (on the 1 or 2 speed setting only) to have the liquid drop down to 33 degree Celsius while moving gently in the mixer. It’s a matter of checking on it often with your temperature gun.
- Once it drops to 33 degrees Celsius, set a timer for 1 hour. The optimal temperature for forming liposomes is between this 33 degrees high point and 25 degrees low point. The job now is for the mix stay in that range (25-33 degrees C) for 60 minutes. During this 1 hour of gentle mixing cover the bowl with a super light fresh clean cloth (pegged to the sides of the bowl so cloth doesn’t end up in the bowl).
- After the Kenwood Chef Mixer has done its 1 hour of work within the ideal liposome temperature range of 25 to 33 degrees C I stop the Kenwood
- Next, I put roughly half of that liquid back into the blender only long enough to bring it up to 31 C.
During this short blend watch it very closely with the thermometer. It really doesn’t take too long in the blender but this is a super important step that if you miss you will surely regret. Don’t get distracted now! - When it reaches 31 C I pour from the blender into a large glass jar and then I do the same to the 2nd half of the liquid in the Kenwood bowl just the same (blend up to 31c and pour into the other glass jar). Use 2 x 2L jars for this step as it’s go a really big bubbly head on it.
-
The glass jars both go into go in the fridge overnight with the lid on to de-gas. Cold fridge not a freezer. If it a cool night (below 15 degrees C) you can leave these jars on the bench top away from heating if there is no fridge space)
Day 2 of 2 is less messy!
Process: With this recipe, we need to divide up all ingredients by 2.Yes, we start by halving up each total. This is so we can do the blending more easily and accurately. My blender says it can take 2 litres, but there is bubbly foam. This foam needs space in the blender or things get messy too fast. So measure out the total into two halves.400g Ascorbic Acid into 2 x 200g
1480ml Pure water into 2 x 740 ml
492g Sunflower Lecithin Powder into 2 x 246g

Day 2 Vitamin C Recipe - Steps
- Bring the cooled foam-free liquid up to 30 degree Celsius: At the same time as gently scraping off the bubbles bring a large stock pot of water to 50 degrees Celsius on the stove top. If your hot water system gives you this temperature or near to this, then don’t’ worry about using the stove. The cool bubble-free liquid needs to be transferred into a clean Borosilicate glass beaker for the step that follows. And have the Laser temperature reader at hand too as you will need it.
- Place the 3 Litre Borosilicate beaker with cool bubble-free liquid inside the 50 degree Celsius water in the stock pot and continuously stir the liquid gently with the spatula until it reaches 30-31 degrees Celsius – NO higher: be careful! You must keep stirring.
You will damage the lipid parcels you have just made if you go above 33 degree Celsius so play it safe with this sensitive medium and make 31 your highest temperature limit .
Do not attempt to place a standard glass jar with cool lecithin in the hot water as it will crack – trust me I’ve lost a batch this way. Use the beaker. - Once at 30-31c remove the beaker from the pot and continue to stir gently as it cools to 26.5 degrees C. Depending on the room temperature it will take as long as it takes. I made some today in a room that was 20 degrees Celsius and it took me 35 minutes of stirring gently to move the liquid from 31 degree Celcius down to 26.50 degrees Celsius.
I set the things up around me so I can sit and be comfortable.
Grab your phone and listen to an inspiring Podcast, music or audio book or simply breathe and contemplate good things happening in your life and in the lives of the people you love.
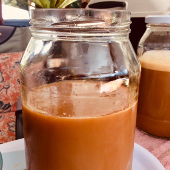
It’s ready ! Time to bottle and keep cool in the fridge.
DO NOT FREEZE
Bottling your Vitamin C
While the mixture is still at 26.5 degrees C, I pour mine into 9 x 220 ml amber glass bottles and label and place in the fridge.
Any dregs I pour into a recycled supplement bottle and use myself first.
You may find the 220ml bottles in a good health food shop or packaging supply shop online.
Labelling your Vitamin C
Labels: These days I give each batch a 12 week best by period when stored in the fridge in my sterile glass jars. Label the jars with the date you made and the best by date and what it contains.e.g each 220ml bottle I make contains at least 44g of Ascorbic Acid.There is approx. 1 gram of ascorbic acid per each 5ml (1 tspn) of liquid
DISCLAIMER: Any and all information in this post was gathered from published research in cell lines or animals, or from typical clinical use. It may not be complete, may not have not been verified in humans, and is NOT meant or given as medical advice, but only as a guide to further exploration.